- This article is about the original game. You may be looking for another Wadanohara and the Great Blue Sea.

|
Worry not, you can help expand it! Remember to read the guidelines. New to wiki-editing? Here's how to get started. |

|
WatGBS (Original) |
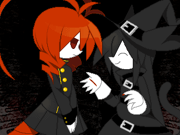
| “ | A clear blue sea under a beautiful blue sky. After a long departure, the sea witch Wadanohara travels back home with her familiars. But her ex-familiar, the shark Samekichi, appears to block her way: "You shouldn't be here... Leave this sea, right now."
|
” |
Wadanohara and the Great Blue Sea (大海原と大海原) is Deep-Sea Prisoner's third game, released on the 21st of December, 2013. The story centers around the game's titular protagonist Wadanohara and her homeland the Blue Sea. In 2020, a reboot of the game was released with some new features.
Premise[]
Wadanohara and the Great Blue Sea revolves around a sea witch named Wadanohara and her familiars Memoca, Dolpi, and Fukami, who return to the Sea Kingdom after hearing how it is at war with the Totsusa Kingdom. During the time Wadanohara spends trying to prevent the war, she is demanded by her ex-familiar Samekichi to leave the Blue Sea.
Age Rating[]
Wadanohara and the Great Blue Sea contains graphic content such as body horror, implied sexual assault, and other violent imagery near the later half of the game. Deep-Sea Prisoner rates the game as 15+; however, this age rating is based on Japanese ratings. The rating may vary from country to country, and hence, an age rating of 18+ may be more appropriate for some.
Chronology[]
No foreknowledge is required to play Wadanohara and the Great Blue Sea.
Chronologically in the timeline, Wadanohara and the Great Blue Sea takes place before Obsolete Dream and Ice Scream, two of Deep-Sea Prisoner's other works. However, these two stories are not direct sequels.
Gameplay[]
Wadanohara and the Great Blue Sea is explored using arrow keys. Confirming an action can be done with the Z, enter, or space keys, while canceling out of an action can be done with the X or escape key.
Money and EXP (experience points) can be obtained after defeating an enemy. Money can be used to obtain items in the shop, while EXP can increase a character's level, which lets them learn more skills that can be used in battle.
When the player interacts with an enemy, they will engage in a battle with them that shows their HP (health points) and MP (magic points). They are given three options, them being "Battle," "Auto," and "Escape." When choosing the "Battle" option, the player will be greeted with four more options: "Attack," "Magic," "Guard," and "Item." "Attack" will make the character attack the enemy regularly. "Magic" will let the player choose a variety of skills to attack the enemy with. The skills a character has are obtained throughout the game as their EXP is increased. Each skill contains a short description. The more critical a skill is, the more MP it will cost. "Guard" allows the player to guard whichever character from the enemy in a turn. "Item" allows the player to use items during battle, either to increase HP or MP or attack the enemy, and other such things. Each item contains a short description.
The "Auto" option in battle lets the battle happen automatically; the actions a character will take against the enemy are chosen randomly. The "Escape" option allows the player to escape from battle. Some battles will not show the "Escape" option, such as certain boss battles.
Characters[]
- Visit the Wadanohara and the Great Blue Sea category for the full overview of characters.
 |
Wadanohara is the protagonist of Wadanohara and the Great Blue Sea. She is a sea witch who greatly cares for all her friends. |  |
Samekichi is Wadanohara's ex-familiar. For reasons Wadanohara does not understand, Samekichi keeps telling her to leave the Blue Sea. |
 |
Fukami is an octopus and Wadanohara's familiar. He is generally quiet and keeps to himself. |  |
Memoca is a seagull and Wadanohara's familiar. She has an energetic personality and loves playing pranks on Dolpi. |
 |
Dolpi is a dolphin and Wadanohara's familiar. She has a bit of a timid personality and is afraid of sharks. |  |
Tatsumiya is an oarfish and Wadanohara's caretaker. She used to be the trusted familiar of Wadanohara's father. |
Development[]

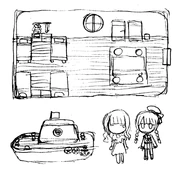
Wadanohara concept art drawn by Deep-Sea Prisoner [1]
Deep-Sea Prisoner has said when working on Wadanohara and the Great Blue Sea, she set out to create a game with a fairytale-like atmosphere. [1] She came up with the title of the game after having decided on the main story beats. [1] The difficulty of the game was made easy so it would be accessible to people. [1]
Initially, Deep-Sea Prisoner wanted to add more violent elements to the game but decided against this. [1] She had designed most of the characters after sea creatures, and since she pictures these creatures as quite peaceful, they became characters wanting peace at all costs. [1] Some of the characters she has grown most attached to are Syakesan and Tarako,[1] who appear in some of her artworks as mascots.
Later during a livestream, Deep-Sea Prisoner said that one of Wadanohara and the Great Blue Sea's themes is "selfish love and altruistic love." [2]
Story[]

|
This section contains heavy spoilers about Wadanohara and the Great Blue Sea. Proceed with caution. |

|
- This section is incomplete. You can help improve this article by expanding it.
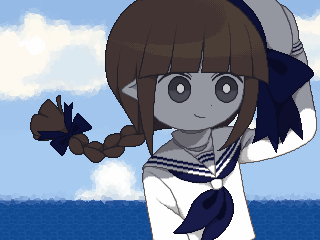
Wadanohara introducing herself to the player.
Afterwards, they continue to travel until they are confronted by Chlomaki and Lobco. Chlomaki returns Wadanohara’s ocarina, which Wadanohara had forgotten on her trip to the Witch World.
Later on, Wadanohara and her familiars arrive in Rocky Area, where they are confronted by Wadanohara’s old familiar Samekichi. Samekichi is angered by the presence of Wadanohara and demands her to leave the Blue Sea. The altercations between him and Wadanohara’s familiars eventually lead to a battle that Samekichi loses. Soon after, Wadanohara and her familiars arrive at the Sea Kingdom Gate and enter.
In the Undersea, Wadanohara and her familiars begin making their way to the Deepsea Town, and on their way they meet with Pulmo who they have a short conversation with. Later on, they find Samekichi and fight him yet again.

Seguro, Miyura, Wadanohara, and her familiars find Helica surrounded by many dead Totsusa Soldiers.
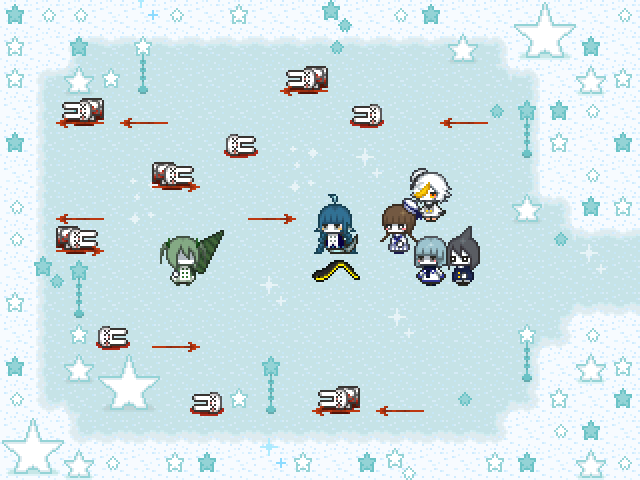
After speaking with Cherryblod and Doloz, Wadanohara decides to go to the Sea God Castle before hearing a sudden explosion near the Sea of Stars. Worried, she follows the noise with her familiars and finds Helica in an angered daze surrounded by a myriad of dead bunnies. In an attempt to calm her down, Wadanohara and her familiars engage in a fight with Helica and win. Helica apologizes for her outburst but is glad that Wadanohara is present to hold back the Totsusa Kingdom's invasion.
The scene then cuts to Samekichi who is watching Wadanohara and her familiars from afar.


The outfit Wadanohara is gifted by Tatsumiya
Once Wadanohara and her familiars arrive, they converse with the castle court members Syakesan, Helica, Pulmo, Tatsumiya, and Uomihime. Jiiya informs Wadanohara of the aggressions made by the Totsusa Kingdom and relies on her help to fix the barrier stones that were supposedly broken by a traitor from within the Sea Kingdom. Afterwards, Chlomaki asks about the Totsusa Kingdom in which Tatsumiya explains how they enraged a war on the Sea Kingdom but refuse to resolve the conflict by discussion. Tatsumiya then states that only a few people in the Sea Kingdom know where the barrier stones are located, and the one who broke them is believed to be Samekichi.
Outside of the castle, Wadanohara and her familiars prepare to leave to fix the barrier stones, but Tatsumiya gives Wadanohara a new outfit beforehand. She thanks her for the outfit before setting off.


Wadanohara and her familiars find Samekichi in front of first barrier stone in Lonely Isle.
Wadanohara and her familiars decide to fix the first barrier stone on Lonely Isle. Before they leave to the surface, Syakesan gives Wadanohara a protective pearl ring and informs her that his friend Shisatsu will quickly bring her from the sea to the surface. Wadanohara thanks Syakesan for his help before setting off. Once Wadanohara and her familiars arrive in Lonely Isle, they make it to the area where the barrier stone is located but find Samekichi waiting for their arrival. They engage in a fight, after which Samekichi loses and flees. Wadanohara then repairs the stone. She comments that she felt a bit strange while fixing it.
Wadanohara and her familiars then travel to the next isle, Windmill Isle. On their way there, Syakesan confronts them and explains that they found the bodies of Totsusa Soldiers floating in the water and tells them to be safe. Once they arrive on the isle, Wadanohara and her familiars find a myriad of Totsusa Soldiers in front of the barrier stone and battle them. Wadanohara fixes the stone and comments that she feels weird yet again.
On their way to the next isle, Hydrangea Isle, Wadanohara and her familiars are approached by Helica, Miyura, and Seguro who ask Wadanohara on her progress with repairing the barrier stones. Helica tells the group that she suspects that some suspicious outsiders of their sea have been helping the Totsusa Kingdom, and any witnesses who saw them were quickly devoured. Fukami assumes it may be the demons the Totsusa Kingdom hired, though Helica and the others are not sure of this. They ask Wadanohara to stay safe before setting off.
It cuts to Samekichi being confronted by Idate. Idate tells Samekichi that he enjoys harassing sharks before the scene cuts to black.

Wadanohara sees Idate after he has beaten Samekichi.
Cherryblod and Doloz and shown taking a walk. Cherryblod protects Doloz from being suddenly attacked by an unknown force.

Cherryblod recovers in his home after being poisoned
In the Sea God Castle, Wadanohara is informed by the court that Cherryblod was injured and is recovering in his home. Before going to the next barrier stone, Wadanohara decides to visit him first. On her way there, it is revealed that he collapsed due to a poison the Totsusa Kingdom is spreading throughout the Sea Kingdom. Once at his home, she speaks with him before departing.
Wadanohara and her familiars then leave to the Coral Path to repair the next barrier stone. This time, Wadanohara does not feel strange whilst repairing the barrier stone.
Minero, Creamil, Rimorimo, and Tomoshibi are shown in the Sea of Stars. Walking to find possible treasure, Creamil distrusts Minero's instincts as the group follows down the path.
Before leaving the Coral Path, Wadanohara finds Pulmo who comments that she can not find Minero and her friends where they usually are.
Wadanohara and her familiars visit the court once again who thank them for their hard work with repairing the barrier stones.
Wadanohara is shown playing her piano in her home. She decides to go outside for a walk and sees Tatsumiya, who chooses to tag along with her. They go to the Sea of Stars where Tatsumiya expresses her thoughts, telling Wadanohara that she should choose if she wishes to stay, and how she does not want her to end up distressing herself, among other things. Wadanohara asks Tatsumiya to not worry for her.
Tatsumiya then informs Wadanohara of a banquet that will take place during the full moon in celebration of the barrier stones being fixed. She suggests that Wadanohara invite Chlomaki to it.
Wadanohara is shown playing her piano in her home. She goes to her familiars and they decide to go to Rainbow Isle to play.
Once they arrive, they find Chlomaki and Lobco and invite them to the banquet. They later leave and go to Wharf Roach Isle. At night, Wadanohara stands outside her boat and reminiscences about the past.
Wadanohara is shown playing her piano in her home. She goes to her familiars as they prepare for the banquet at the Sea God Castle. During the banquet, Wadanohara decides to go outside for a break.
The scene cuts to Tatsumiya telling Chlomaki of the past war between Mikotsuhime and Uomihime.
While outside, Wadanohara sees Samekichi as a loud noise can be heard in the distance. Samekichi runs to the noise and Wadanohara follows after. At the Kingdoms Gate, Wadanohara notices Samekichi injured on the ground as Laurentia approaches them. All the barrier stones that were repaired suddenly break, and as they do, Wadanohara begins to feel dizzy. She goes comatose as people from the Totsusa Kingdom, namely the princess Totsusahime, enter the Sea Kingdom.

Wadanohara playing the piano
The scene cuts to Wadanohara playing the piano. Samekichi goes to her after a long rest; Wadanohara tells him of an isle she would like to visit, named Apple Isle. Once they arrive, Wadanohara admits she wanted to visit the isle to gather apples for Irena, and that she avoided mentioning this reason so Samekichi could come with her. Samekichi becomes upset at the mention of Irena.
Wadanohara and Samekichi leave and find Chlomaki resting on a tree. They speak with her as Chlomaki slightly teases Samekichi and eventually disappears.
As they return to their journey, Wadanohara mentions how much she enjoys playing the piano and that she wishes she had a portable instrument to carry and always play.
Irena thanks Wadanohara for bringing her apples. Wadanohara leaves with Tarako to the Sea of Stars to see some treasure that they found. Once they leave, Samekichi asks Irena "what makes girls happy to get as a present." Irena offers her suggestion and Samekichi leaves to inform Nekoyama.
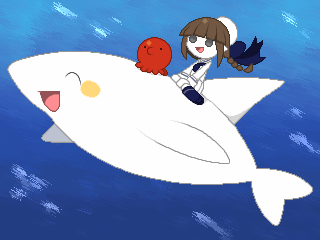

Wadanohara and Tarako riding on Syakesan
They find Tatsumiya who asks Syakesan if he finished his task. Realizing he did not, Syakesan quickly returns to the Sea of Stars. Tarako decides to come with him to help with his work. Wadanohara talks with Tatsumiya before she decides to find Samekichi.
On the surface, Samekichi can be seen speaking with Nekoyama on a rock. They talk until the sunset when Wadanohara finally finds Samekichi. They go to a tree to watch the stars and talk about Wadanohara's father among other things. Near the end of their conversation, Samekichi asks Wadanohara to come to Star Isle on the next full moon, and Wadanohara obliges.
Samekichi waits for Nekoyama on the same rock he last spoke to him on. Tarako approaches Samekichi and they have a back and forth.
Wadanohara speaks to Cherryblod and Doloz in the Coral Sea. She leaves them and remembers that Tatsumiya had asked her to come to the Sea God Castle. There, Tatsumiya tells Wadanohara that the location of the Sacred Sword has been moved, and only she, Wadanohara, and Uomihime know of this. She asks Wadanohara to keep it a secret, and she agrees.
Outside, Wadanohara finds Samekichi and they return home.
Wadanohara is asleep. She wakes up as she and Samekichi leave for Star Isle. There, Samekichi gifts Wadanohara an ocarina and confesses his feelings for her. Wadanohara misinterprets his confession, though Samekichi decides to reiterate it another time.
Wadanohara is woken up by Memoca in the Sea God Castle. She recalls her memories of the past and is informed of the Totsusa Kingdom's invasion among other things. Memoca and her exit the castle to find Dolpi and Fukami in front of Ver Million with some Totsusa Soldiers. When Wadanohara and Memoca approach them, Ver is taken aback by Wadanohara's appearance.
Totsusahime, Artamos, and Hofuru then arrive. Memoca is surprised that Artamos is a small robot, rather than a large monster like she remembers. Artamos explains that a spell was cast upon on by a witch changing his appearance to what it is now. Totsusahime, Artamos, and Hofuru later leave, and Ver allows the Totsusa Soldiers to battle Wadanohara and her friends before leaving.
They make it to the Deepsea Town where they are confronted by many Totsusa Soldiers at the entryway. Helica, Miyura, Seguro, and many fish soldiers suddenly arrive to fight them off.


Battle with Adauchi
They then return to the Deepsea Town and hear a loud noise near the Sea God Castle. They decide to check the noise before Wadanohara begins to have another headache.
At the trail leading to the Sea God Castle, Wadanohara and her familiars find many Totsusa Soldiers. Walking around, they find Laurentia and battle her. The scene cuts to Syakesan and Tatsumiya. Syakesan chooses to go to the front of the castle to fight off the enemy.

Chlomaki offers Lobco her blood
When they get closer to the Sea God Castle, Wadanohara and her familiars find Ver again and finally battle her. They win, and she leaves as Wadanohara has another headache.
Wadanohara and her familiars then battle Adauchi, Ver, and Laurentia. After battling them, Memoca, Dolpi, and Fukami decide to fight them off while Wadanohara goes to the Sea God Castle on her own.
Hofuru confronts Tatsumiya at the front of the Sea God Castle.


Battle with Hofuru
Wadanohara finds Pulmo on the trail to the Sea God Castle. Pulmo passes out and Wadanohara starts having another headache. She feels relieved to find Tatsumiya until she realizes it is Hofuru in disguise after the real Tatsumiya points it out.
Wadanohara enters the castle after battling Hofuru and finds both her, Totsusahime, and a group of Totsusa Soldiers on the first floor of the castle. Wadanohara battles Totsusahime, and she cries because Wadanohara will not let her fight Uomihime. Artamos arrives and becomes agitated with Wadanohara once he sees Totsusahime crying and engages in a battle with her.

Uomihime and Totsusahime make up
The spell that the Totsusa Kingdom used to breathe under water begins to wear off, and they all begin to retreat to their kingdom. Wadanohara and her familiars leave the castle and go to Tatsumiya. Wadanohara begins having another headache, before she and Tatsumiya both witness the Cast Pearl shatter. They then notice a figure on top of the castle holding a sword.
Syakesan reveals to be the Ambassador to the Sea of Death
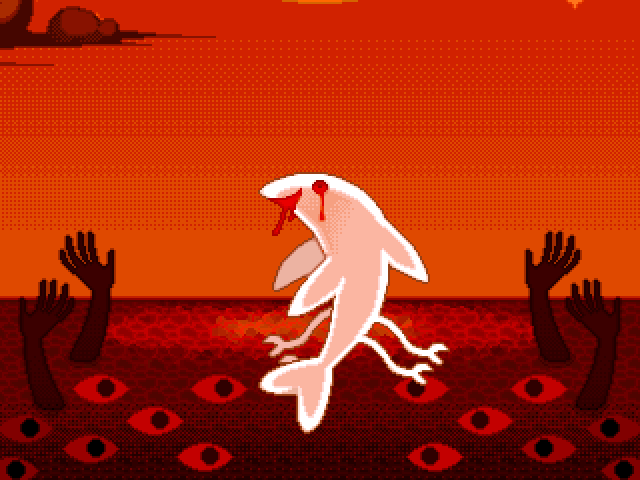
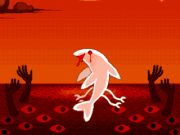
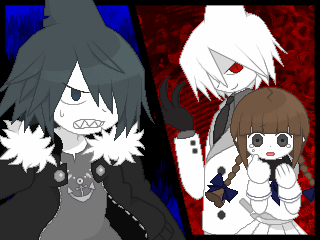
Wadanohara and her familiars battle Syakesan, and the sea turns red. The protective pearl ring that Syakesan gave to Wadanohara before she repaired the barrier stones turns from white to black, and it is shown to be the cause of Wadanohara's headaches.
Syakesan then transforms into his humanoid form to remind Wadanohara of what he did to her in the past.
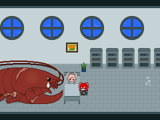
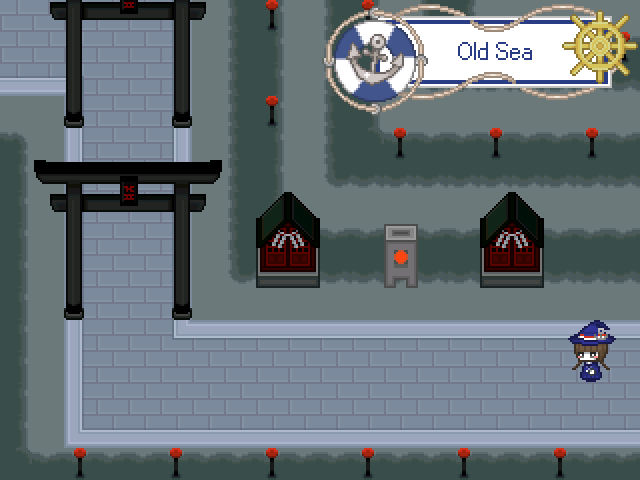
Samekichi leaves Wadanohara in the Coral Sea. Syakesan hurriedly approaches her and exclaims that the Sacred Sword has been stolen. The two go to the Old Sea where Syakesan claims Tatsumiya is in. However, Wadanohara does not find Tatsumiya, and Syakesan tells her that he lied.
Wadanohara wakes up from her comatose state in the Sea of Death, accompanied by her familiars and Samekichi. Wadanohara explains that Samekichi was not the traitor of the Sea Kingdom, and her familiars apologize to him for how they treated him before. She then explains the history of the Sea of Death and creates a portal where she and the others try and leave.
Later, they make it to the Blue Sea and walk to the Old Sea. There, they find Syakesan and Wadanohara recalls some of her memories.
Samekichi confronts Syakesan to save Wadanohara
The scene cuts out of Wadanohara's memory, and Mikotsuhime appears in front of her and her familiars. They fight Mikotsuhime but are not able to inflict any damage on her. Mikotsuhime then approaches Wadanohara, and she begins to feel uneasy.
- This section is incomplete. You can help improve this article by expanding it.
Wadanohara goes into a comatose state and finds herself resting in her home. She goes downstairs where she finds her familiars and tells them that she feels uneasy. Memoca suggests that she take a walk outside, which Wadanohara does before returning home. She feels better before her house turns dark and gory and her familiars lay dead in front of her. A similar scene is found once Wadanohara exits her home. She speaks to herself as her eyes turn from pitch black to red.
Samekichi is shown holding Wadanohara and asking her to wake up. Wadanohara's familiars are angered at Syakesan. As Mikotsuhime leaves for the Sea God Castle where Uomihime is, the inhabitants of the Sea of Death are unleashed.
Wadanohara finds herself in a strange dim area. She walks around before finding a tall white tower where Meikai stands next to. Meikai offers to lend his power to Wadanohara and tells her not to give up, among other things.
Wadanohara wakes up in the company of her familiars. She finds herself in possession of Meikai’s staff and thanks him. She and her familiars leave to fight against the Sea of Death.
Uomihime notices that Mikotsuhime will come to the Sea God Castle for her and asks Pulmo and Tatsumiya to leave it. Tatsumiya refuses as she believes it would make her a disappointment being Meikai’s familiar. Pulmo leaves to check Helica and the others.
Wadanohara and her familiars walk around the Sea of Death and find Tsuribari. Tsuribari summons a monster to fight Wadanohara and her familiars and they defeat it successfully. Later, Tsuribari is seen with Stella, telling Squid that he can eat Wadanohara and her familiars.
Tatsumiya finds Old and scolds him for betraying her and Meikai. He threatens to hurt her.
Wadanohara and her familiars walk around the Sea of Death and eventually find Squid. They fight each of his tentacles and win.
Tatsumiya sits injured in front of Old, who threatens to tear her face like she did his. Suddenly, Idate approaches the two and he criticizes Old’s method of combat. Old is then beaten by Idate. Wadanohara and her familiars arrive and exchange with Tatsumiya and Idate. Old regains consciousness and battles Wadanohara and her familiars and loses. Idate offers to take care of Tatsumiya while Wadanohara and her familiars set off to the Sea God Castle.
Syakesan, Sheep, Tsuribari and Stella are seen on the bridge to the Sea God Castle. Sheep prepares to battle Wadanohara and her familiars to take out the grudge they have against Meikai for "stealing" Old.
Uomihime and Jiiya watch as Mikotsuhime enters the top floor of the Sea God Castle.

Totsusahime, Artamos, and Hofuru protect Helica, Miyura, Seguro, and Pulmo.
At the Sea God Castle, Wadanohara and her familiars find their way up to Sheep, who fights the group. Wadanohara defeats Sheep as they fade away. Wadanohara finds Tsuribari and Stella, where Tsuribari asks Wadanohara if she truly thinks this is the right thing to do. They engage in battle and wins, also causing Tsuribari and Stella to fade away. On the way to the top, Samekichi is snatched by Syakesan. He tells Wadanohara to move on without him. If Wadanohara chooses to go after Samekichi, this triggers the second bad ending.
However, moving on without Samekichi, Wadanohara and her familiars continue. Uomihime and Mikotsuhime converse, as she proclaims about Mikotsuhime not being chosen by their father. Uomihime uses her powers to activate a portal mirror as it makes Mikotsuhime distressed. Wadanohara and her familiars make it to Uomihime where she is weakened due to not using her powers. Despite Uomihime’s concerns, Wadanohara leaves her familiars and progresses to the portal mirror, which takes her to the Old Sea.
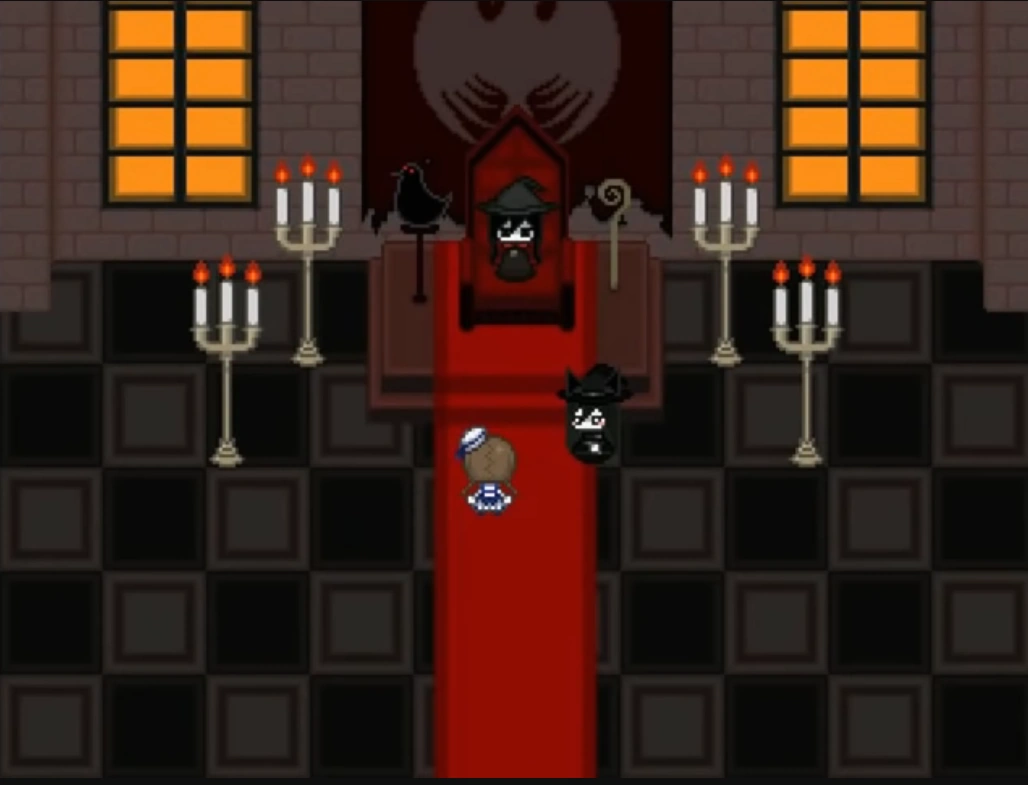
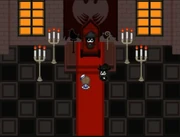
Wadanohara, Chlomaki, and the Great Witch in her throne room
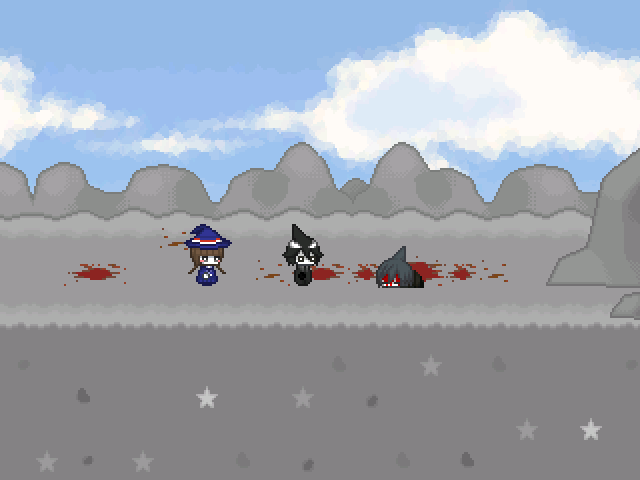
In the present, Wadanohara is ready to enter through the Old Sea's gates as Chlomaki and Lobco observe her from afar. Wadanohara makes her way through, finding a trail of blood leading to The Sea of Death’s gateway. There, Syakesan, Samekichi, and Mikotsuhime are present. Wadanohara finds Samekichi with an injury on his face, and Syakesan looks happy to see Wadanohara.
Easter Eggs and References[]
Cameos[]
- Three letters about the surface written by Reley Lo can be found in Irena's house.
- Multiple empty chests with a Mogeko inside them can be found throughout the game.
- Tsumuri, the main character of Poison Bugs, can be seen in an unreachable area on Hydrangea Isle.
- Noir can be seen on Lonely Isle.
- A cutscene showing the witches who reside in the Witch World, namely Shiroame, Tokinome, Kaen, Tetsuzora, Starlit Night, Hanahata, Bloody Mary, and Sagan, is shown before Wadanohara's conversation with the Great Witch.
- A cutscene with multiple witch silhouettes plays during the Great Witch's speech to Wadanohara. The witches that appear are, in order:
- In the Bonus Room video "Merc Aftermath," Giltz, Gyakuten, Sullivan, Maekami, Benihotaru, and an unnamed demon make a cameo in Maekami's bar.
- In the Bonus Room video "The Squid Returns," Rock, a character from Ice Scream, finds Squid in Iceberg Isle after he was defeated.
- During Met's Bloody Radio interview a question from S!T!N (Satanick) is mentioned. [3]
Features[]
- Three works made by three different fans of the game were featured by Deep-Sea Prisoner in the game's bonus page, accessible by players who beat the game.
- A small model of Wadanohara's appearance in Normal End 2 was created by a user by the name of 夜宵様.
- A YouTuber by the name of YZYX created a song titled The Little Witch featuring Wadanohara.
- A YouTuber by the name of Yojelin made an instrumental piece titled The Blue Sea Witch, which tries to convey the atmosphere of Wadanohara's presence during Normal End 2 as the Blue Sea Witch.
Various[]
In Wadanohara and the Great Blue Sea, seven keys can be found scattered around the Blue Sea. Collecting them helps unlock a red treasure chest found in the Sea Kingdom, which will grant the player 99 of the ultimate healing items. [4]
- The first key can be found on the right path in Star Isle. [4]
- The second key can be found near a grave in Lonely Isle. [4]
- The third key can be found on the left path in Windmill Isle. [4]
- The fourth key can be found near the end of Hydrangea Isle. [4]
- The fifth key can be found up the path in Rocky Mount. [4]
- The sixth key can be found near the top left corner of the Sea Kingdom. [4]
- The seventh key can be found on a path through Rainbow Isle. [4]
")
")
")
")
")
")
")
Gallery[]
Preview Images[]
")
")
")
")
")
")
")
")
Promotional Artwork[]
")
Merchandise[]
")
")
")
")
")
")
")
")
")
")
")
")
")
")
")
")
")
")
")
")
")
")
[]

.png)
Deep-Sea Prisoner's Works | ||
| Games | Garden Gray The · Ice Scream · Mogeko Castle (Remake) · The Gray Garden · Wadanohara and the Great Blue Sea (Reboot) | |
| Manga | Obsolete Dream · Seaside Dispatches 1 · Seaside Dispatches 2· Wadanohara and the Great Blue Sea | |
| Animations | Poison Bugs · The Sun's Curse | |
| Artbooks | Halloween in the sea | |
| Future Works | ||
| Games | A Paradise Submerged in Darkness · Buri~ing · Carnival Rhythm · Devil Girl Ivlin · General Hashasky's Great Adventure · Oji-summer · The End of the Wonderland · The Gray Garden (Remake) | |
| Manga | Decem Anges et Demons · Records of the Deep Sea (The Sea of Glittering Stars) · Seaside Dispatches 2.5 · Seaside Dispatches 3 · Uyamuya | |
References[]
- ↑ 1.0 1.1 1.2 1.3 1.4 1.5 1.6 "Genepixiv Interview with Shuujin Kaitei, author of the free videogame Wadanohara and the Great Blue Sea". Pixivision. pixivision.net. Published 25 December, 2015. Retrieved 6 March, 2022. (Archive.)
Note: Deep-Sea Prisoner's gender was incorrectly assumed to be male by the translator of this interview. - ↑ "funamusea Stream [2022.10/01]【Art / Chatting】". Deep-Sea Prisoner. YouTube. Published 1 October, 2022. (Summary archive.)
- ↑ Wadanohara and the Great Blue Sea (Original). Deep-Sea Prisoner. Translated by Vgperson. Published 21 December, 2013.
- ↑ 4.0 4.1 4.2 4.3 4.4 4.5 4.6 4.7 "Wadanohara and the Great Blue Sea". Vgperson. Date Unknown. Retrieved 2 March, 2023. (Archive.)